


Combine Webflow and Shopify for a Stronger Online Store
For most stores, the fastest path to a better ecommerce experience is a no-code connector or Shopify’s Buy Button embed, not a full custom build. Start there, prove out the design and conversion gains, and only move to a headless Storefront API setup once your catalog or workflow genuinely outgrows the simpler option. That single decision, more than any line of code, determines whether your Webflow and Shopify project ships on budget or turns into a six-month engineering slog.
Combining the two platforms works because each one does the job it was built for. Webflow handles the storefront, meaning design, content, and CMS structure, while Shopify runs the commerce engine underneath: inventory, payments, checkout, and order management. You get Webflow’s layout freedom without rebuilding a payment stack from scratch.
Key Takeaways
Most stores get the best results from validating with a no-code connector or Buy Button first, then moving to a custom Storefront API build only once catalog size or design needs justify the added engineering cost.
| Point | Details |
|---|---|
| Start simple | Validate demand with Buy Button or a no-code connector before investing in custom middleware. |
| Pre-render for SEO | Store product content in Webflow CMS and reserve API calls for live inventory and pricing only. |
| Checkout stays on Shopify | Standard plans redirect to Shopify’s hosted checkout; full customization needs Shopify Plus. |
| Webhooks keep data current | Subscribe to product and order events to avoid stale inventory and missed conversions. |
| Phenyx handles full builds | Phenyx manages design, Webflow-Shopify integration, and post-launch maintenance as one service. |
What’s the easiest way to sell Shopify products on a Webflow site?
The Buy Button is the lowest-effort option. Generate the embed snippet in Shopify, paste it into a Webflow Embed element, and it works within hours without any custom development.
Do I need Shopify Plus to use Webflow with Shopify?
No. Standard Shopify plans work fine with Buy Button, no-code connectors, and even Storefront API setups. Shopify Plus is only required if you want to customize the checkout page itself with extensions.
Will using Webflow with Shopify hurt my SEO?
It can, if product content loads purely through client-side JavaScript. Pre-rendering product data into Webflow’s CMS and pointing canonical tags at your Webflow domain avoids most indexing problems.
How do I keep inventory in sync between Shopify and Webflow?
Use Shopify webhooks (products/update, orders/paid) to trigger updates, and query the Storefront API for live stock counts rather than storing quantities as static CMS fields.
When should I choose a custom Storefront API build over a no-code connector?
Choose custom headless development once your catalog complexity, design requirements, or traffic volume genuinely outgrow what a connector like Shopyflow or Smootify can handle reliably.
Table of Contents
- Quick Summary
- How Do the Four Integration Approaches Compare?
- What Are the Setup Steps for Each Approach?
- How Do You Keep Product Pages SEO Friendly?
- What About Performance and Checkout UX?
- What Ongoing Maintenance Does This Setup Need?
- Which No-Code Tools Should You Actually Use?
- What Mistakes Break Webflow-Shopify Integrations Most Often?
- When Does It Make Sense to Hire an Agency for This?
- Get Help Building Your Webflow and Shopify Store
- Sources
Quick Summary
- No-code connectors (Shopyflow, Smootify, Looop) sync Shopify products into Webflow CMS fastest and fit most small to midsize catalogs.
- Buy Button embeds are the lowest-effort option: generate a snippet, drop it in a Webflow Embed element, done.
- Middleware sync (Zapier, Make, or custom webhook logic) suits teams with existing tool stacks or lightweight automation needs.
- Storefront API / headless setups give full control but demand real developer time and ongoing maintenance.
- Checkout always redirects to Shopify’s hosted domain unless you’re on Shopify Plus with checkout extensibility.
- Pre-rendering product content in Webflow CMS protects your SEO; pure client-side API calls do not.
- Validate your approach with a no-code connector or Buy Button before committing budget to custom middleware.
How Do the Four Integration Approaches Compare?
Each approach trades speed for control differently, and picking the wrong one for your catalog size is the most common expensive mistake in these projects.
Buy Button is a Shopify sales channel that generates an embeddable snippet with a product widget and cart, dropped directly into a Webflow Embed element. No-code connectors like Shopyflow or Smootify pull your Shopify catalog into Webflow’s CMS collections automatically, so you design real pages instead of styling a widget. Middleware sync tools such as Zapier or Make move data between the two platforms on triggers, useful for smaller sync jobs rather than full storefront replication. Storefront API / headless means custom code queries Shopify’s GraphQL API directly and builds the entire shopping experience from scratch inside Webflow.
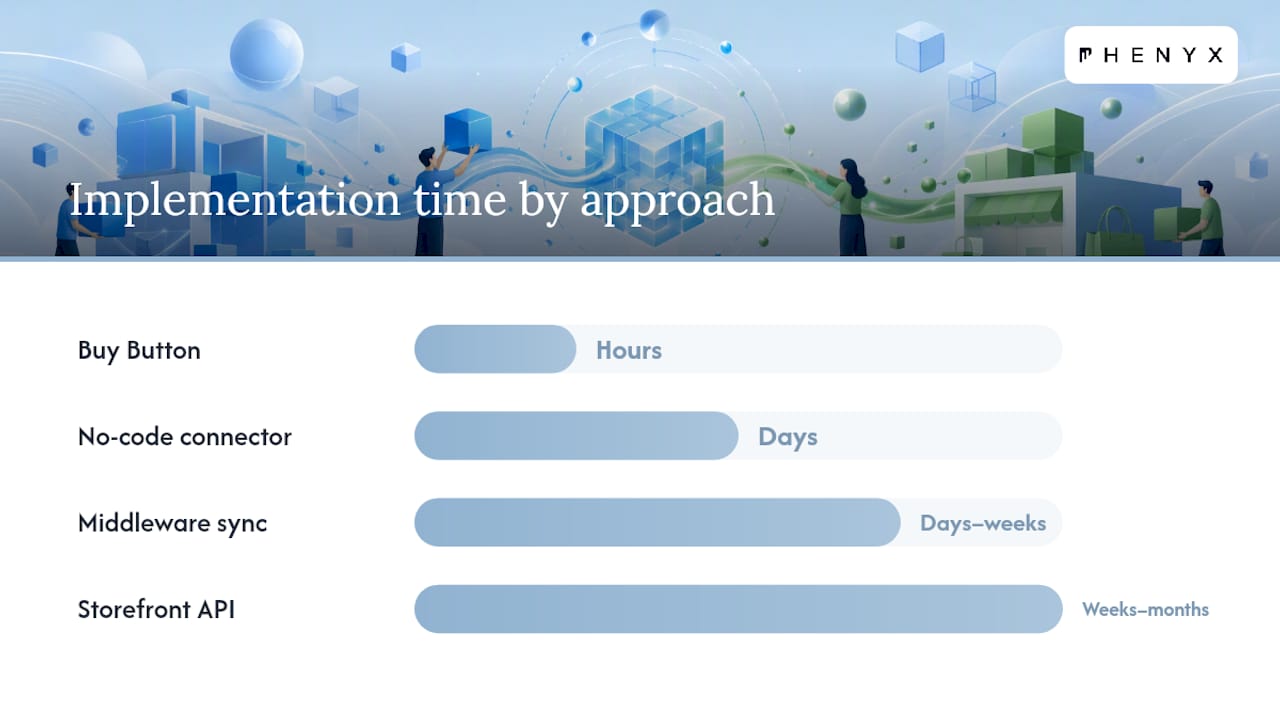
| Approach | Best for | Technical complexity | Cost | SEO impact | Time to implement |
|---|---|---|---|---|---|
| Buy Button | Small catalogs, quick tests | Low | Low (included in most Shopify plans) | Limited, widget content isn’t crawlable | Hours |
| No-code connector | Growing stores wanting real CMS pages | Low to moderate | Moderate (app subscription fees) | Strong, pages are indexable | Days |
| Middleware sync | Teams with existing automation stacks | Moderate | Moderate (per-task pricing) | Depends on implementation | Days to weeks |
| Storefront API / headless | Large catalogs, custom UX needs | High | High (developer hours) | Strong if pre-rendered correctly | Weeks to months |
A few tradeoffs worth flagging before you pick:
- Buy Button skips CMS work entirely, but that widget content generally will not get indexed by search engines the way a real page does.
- No-code connectors handle variants and metafields well, though most charge a monthly fee tied to product count.
- Middleware gives flexibility for niche automations but can turn brittle once you’re syncing hundreds of SKUs on a schedule.
- Headless Storefront API setups give you total design control, but every checkout, cart, and inventory edge case becomes your responsibility to build and maintain.
What Are the Setup Steps for Each Approach?
Here’s what the actual implementation looks like once you’ve picked a lane.
Buy Button setup
- In your Shopify admin, generate a Buy Button embed for the product or collection you want to sell.
- Paste the generated snippet into a Webflow Embed element on the page.
- For multiple products, connect the embed code to CMS fields so each product page pulls its own snippet dynamically.
No-code connector flow
- Install a connector app (Shopyflow, Smootify, or Looop) from the Shopify App Store.
- Generate the storefront token or app key it requests during setup.
- Configure the sync to pull products, variants, and collections into Webflow CMS.
- Map Shopify fields (price, images, description, metafields) to your Webflow CMS collection structure.
- Test the add-to-cart button and confirm it redirects correctly to Shopify checkout.
Middleware / serverless sync
- Subscribe to the Shopify webhooks you actually need (more on that below).
- Write transform logic that reshapes Shopify’s payload into whatever your Webflow CMS API expects.
- Make writes idempotent, so a webhook firing twice doesn’t create duplicate CMS items.
- Build error handling that retries failed writes and logs anything that fails permanently.
Storefront API headless checklist
- Create a custom app in your Shopify admin and enable Storefront API access.
- Configure the specific API scopes you need (unauthenticated_read_product_listings, unauthenticated_write_checkouts, and similar).
- Generate your Storefront API access token and store it securely, never in client-visible code.
- Write your product query and your
cartCreatemutation, which returns thecheckoutUrlyour frontend redirects to. - Test the full flow: browse, add to cart, checkout, and confirm the order lands in Shopify with correct line items.
Pro Tip: Build your headless cart flow against a Shopify development store first. Testing checkout redirects on a live store risks real transactions if something breaks mid build.
How Do You Keep Product Pages SEO Friendly?
Pre-rendering is the single biggest lever here. Store each product’s Shopify handle in a Webflow CMS field, build the actual page content (title, description, images) inside that CMS item, and reserve JavaScript API calls for things that genuinely need to update live, like inventory counts or pricing changes. Engineering patterns for this split consistently recommend this approach because search crawlers read rendered HTML, not the results of a client-side fetch call that happens after the page loads.

Something most teams miss: canonical tags should point to your Webflow storefront domain, not back to Shopify, even though Shopify is technically running your checkout. Getting this backwards is one of the most common reasons stores accidentally split their SEO equity between two domains.
A few more essentials for staying indexable:
- Add Product schema (JSON-LD) in a Webflow custom code embed on each product template, covering name, price, availability, and image.
- Submit your Webflow sitemap through Google Search Console and keep it separate from any Shopify sitemap you’re not actively using.
- When a product is discontinued, set up a 301 redirect rather than letting the page 404. A dead product page that used to rank is lost equity if you don’t redirect it somewhere relevant.
- Run periodic checks in Search Console for duplicate content flags, particularly if you ever had a Shopify theme live on the same domain previously.
What About Performance and Checkout UX?
Splitting your frontend from your commerce backend introduces real performance tradeoffs if you’re not careful. Every API call your page makes on load adds latency, so the goal is minimizing what actually needs to happen client-side.
- Pre-render everything static (descriptions, images, layout) and reserve live calls strictly for inventory and price.
- Compress and lazy-load product images; Webflow’s native image optimization handles most of this automatically if you use its asset manager correctly.
- Limit third-party scripts on product pages. Every chat widget or tracking pixel you add is milliseconds of delay stacked on top of your API calls.
- Design your cart drawer to feel native to the Webflow experience, then hand off cleanly to Shopify’s hosted checkout when the customer is ready to pay.
That handoff matters more than most teams expect. Shopify controls checkout design by default, and full checkout customization requires Shopify Plus with checkout extensibility enabled. For most merchants, the standard hosted checkout converts well on its own, but the visual jump from your custom Webflow storefront to Shopify’s default checkout page can feel jarring if you skip the styling options Shopify does give you.
Pro Tip: Match your Shopify checkout’s brand colors, fonts, and logo to your Webflow site under Shopify’s checkout branding settings. It’s a five-minute fix that removes most of the “wait, did I leave the site?” feeling customers get during a domain switch.
Set up cross-domain tracking in your analytics platform before launch, not after. If your Webflow domain and Shopify checkout domain aren’t linked correctly, you’ll see traffic and abandoned carts but no completed conversions, which makes every marketing decision after that point a guess.
What Ongoing Maintenance Does This Setup Need?
The integration doesn’t end at launch. Keeping Webflow and Shopify in sync is an ongoing operational habit, not a one-time task.
Subscribe to these webhook events and route each one somewhere useful:
- products/create and products/update, to trigger your sync logic whenever inventory changes catalog data.
- products/delete, so removed items get flagged for redirect setup rather than left as dead pages.
- orders/paid, useful for triggering fulfillment or support workflows tied to a completed sale.
- fulfillments/create, to keep any downstream reporting or customer notifications current.
For sync strategy, combine build-time syncing (product pages regenerate on a schedule or on webhook trigger) with client-side calls for anything genuinely live, like stock counts. Accept that there will be a small window of eventual consistency between a Shopify change and its reflection in Webflow. Design your alerts around that reality instead of expecting instant sync.
- Monitor for failed sync jobs and set up alerts, not just logs nobody checks.
- Watch API rate limits if you’re on the Storefront API; hitting them silently breaks page loads.
- Run a monthly reconcile job comparing Shopify inventory counts against what’s cached in Webflow CMS.
- Confirm checkout conversions are actually landing in your analytics dashboard, not just cart-adds.
Which No-Code Tools Should You Actually Use?
| Tool | Primary capability | Best fit |
|---|---|---|
| Shopyflow | Full product sync into Webflow CMS with cart components | Stores wanting real CMS-driven pages fast |
| Smootify | Syncs products, variants, and metafields into Webflow CMS | Catalogs with complex variant structures |
| Looop | Cart and checkout components built for Webflow | Teams wanting prebuilt cart UI without custom design |
| Buy Button | Embeddable widget snippet | Quick tests, single-product launches |
| Zapier / Make | Trigger-based automation between apps | Lightweight sync tasks, notifications, non-storefront workflows |
Buy Button wins when you just need to validate demand for a handful of products fast. Shopyflow, Smootify, or Looop win once you’re ready to design real product pages and want variants, metafields, and multi-currency handled without custom code. Zapier and Make aren’t built for full storefront sync, but they’re excellent for smaller jobs, like notifying your team when a high-value order comes through. Check each app’s listing in the Shopify App Store for current pricing before committing, since most charge based on SKU count or order volume rather than a flat fee.
What Mistakes Break Webflow-Shopify Integrations Most Often?
The same handful of mistakes show up across nearly every troubled project.
- Client-side-only rendering. Loading all product content through JavaScript API calls with nothing pre-rendered kills your SEO before you even launch.
- Stale CMS inventory. If your sync only runs occasionally, customers see products as available when they’re actually sold out.
- Missing canonical tags. Without them pointed at your Webflow domain, search engines can get confused about which version of a page to rank.
- Unhandled product deletions. A removed product without a redirect plan becomes a dead-end 404 that used to be a ranking page.
Developer checklist: verify API scopes are scoped tightly (not over-permissioned), build idempotent write logic, handle errors gracefully instead of failing silently, and plan for Shopify’s API rate limits from day one.
Designer checklist: confirm your URL structure stays clean and consistent, every product page carries proper SEO metadata, and the visual handoff to Shopify checkout doesn’t break brand continuity.
Pro Tip: Set a recurring maintenance rhythm: daily inventory spot-checks, weekly sync audits, and a monthly performance review. Most integration failures aren’t dramatic outages, they’re small drifts nobody caught for three weeks.
When Does It Make Sense to Hire an Agency for This?
The hybrid Webflow and Shopify architecture earns its cost when your catalog, your fulfillment complexity, or your design ambitions outpace what a no-code connector or a single in-house developer can reasonably maintain. If you’re managing a few dozen SKUs with straightforward variants, a connector like Shopyflow probably gets you most of the way there on your own.
Bring in outside help once you notice a few specific signals: your SKU count is growing fast enough that manual CMS mapping breaks down, fulfillment has grown complex enough that webhook logic needs real engineering attention, or your current site’s design is actively costing you conversions that a stronger Webflow build could recover. Limited in-house Webflow expertise is often the real bottleneck, not the platform choice itself.
On projects like this, Phenyx typically handles the full design-to-build workflow: translating brand direction into a Webflow theme, wiring up the Shopify connection correctly the first time, setting up cross-domain analytics so conversions actually get tracked, and staying on for post-launch maintenance so sync issues get caught before customers notice them. That last part, the after-launch upkeep, is where most DIY builds quietly fall apart.
Get Help Building Your Webflow and Shopify Store
Phenyx is the alternative to piecing together a Webflow and Shopify build from app tutorials and forum threads: one team handles the design, the integration, and the ongoing upkeep, so you’re not left debugging a broken sync at 11pm with no one to call.

Our team builds Webflow storefronts connected to Shopify’s commerce engine as a core part of our web design work, covering everything from CMS structure and product sync to SEO setup and checkout continuity. We handle the design-to-theme workflow, the Storefront API or connector configuration, and the cross-domain analytics that most in-house teams miss on their first attempt. If your current store’s design is holding back conversions, or you’re evaluating whether a headless build makes sense for your catalog, take a look at our website redesign work and reach out for a project consult. We serve clients directly out of Denver and Lafayette, Colorado, Tampa, Florida, and the Dallas-Fort Worth area, and we work with ecommerce teams well beyond those markets too.
Sources
- Webflow integrations — Shopify
- Buy Button documentation — Shopify Help
- How To Integrate Shopify Into Webflow — Composite
- Smootify — Shopify App Store